Parents,
When your child finishes their art project, please feel free to send it along to Ms. Kusum. She would love to see the completed projects and is working on an online art gallery for Kenter. Her email is: [email protected].
When your child finishes their art project, please feel free to send it along to Ms. Kusum. She would love to see the completed projects and is working on an online art gallery for Kenter. Her email is: [email protected].
Activity for Wednesday, June 10th
Dear Artists,
This is my last lesson that I am sending to you before you go off on summer break! I hope you all have a fun summer and stay creative!
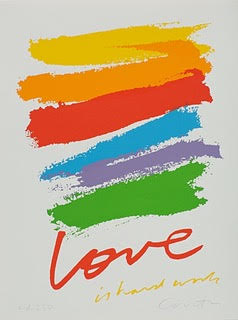
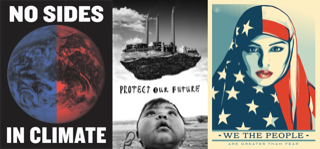
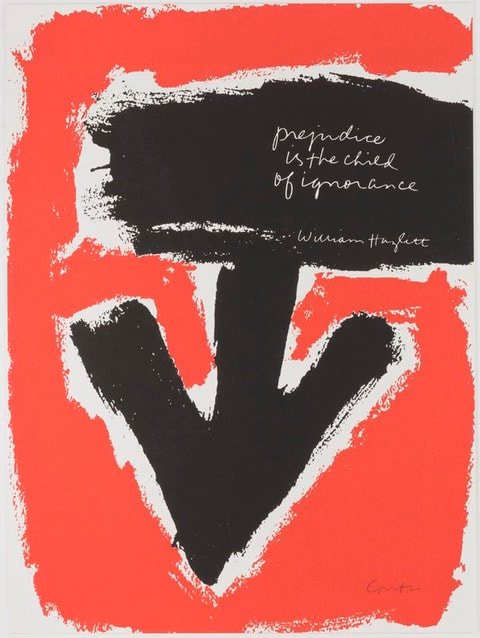
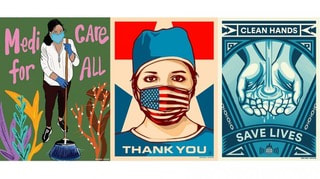
In this lesson we will learn about Activist Art. Activist artists observe things in the world that are injustices and unfair and bring attention to these things in their art. Sometimes they use words and symbols (simple bold pictures) to get their point across. They print posters of their work or murals which are large paintings done on a wall so lots of people will see it.
Materials: paper, pencil, pasteboard/cardboard, paints or markers
Below are some examples of activist artists artwork. Make a list of symbols that they included. What do you think they are interested in changing about the world?
This is my last lesson that I am sending to you before you go off on summer break! I hope you all have a fun summer and stay creative!
In this lesson we will learn about Activist Art. Activist artists observe things in the world that are injustices and unfair and bring attention to these things in their art. Sometimes they use words and symbols (simple bold pictures) to get their point across. They print posters of their work or murals which are large paintings done on a wall so lots of people will see it.
Materials: paper, pencil, pasteboard/cardboard, paints or markers
Below are some examples of activist artists artwork. Make a list of symbols that they included. What do you think they are interested in changing about the world?

Step 1: Think about what you think people in our community should work on. What would you like to see more of in the world? What do you think people need to do less of to make our world a better place?
Step 2: On a sheet of paper brainstorm all the words and images that you can think of that speak about your cause. There are no bad ideas in a brainstorm so list as many ideas as will pop into your mind. Try to come up with at least 7 words or phrases and 3 pictures.
Step 3: On a large poster or sheet of cardboard design your artwork in pencil. Write the words large so people will be able to read them from far away. Choose the image that speaks best about your activist idea. Select a few bold colors that stand out to paint or color your poster. Email images of your work to me at [email protected]
Activity for Wednesday, June 3rd
|
Hi Artists,
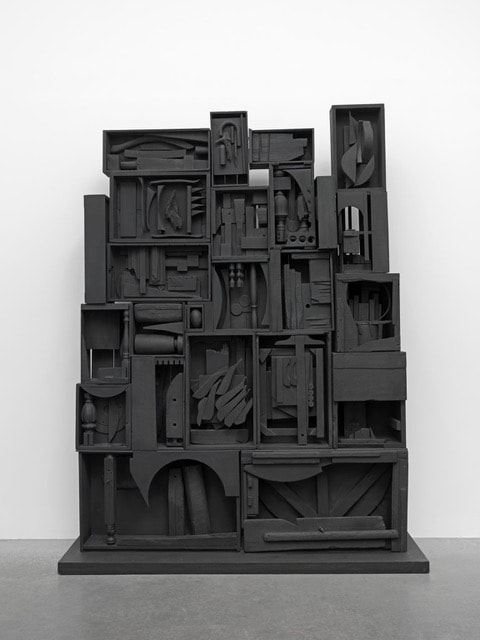
In this lesson, we will make a sculpture out of recycled materials inspired by the artist Louise Nevelson. She was an artist who moved to America from the Ukraine and lived and worked in New York city. She created sculpture out of wood and found objects. She often painted her sculptures a single color. Art that is mostly one color is called monochromatic art. |
|
|
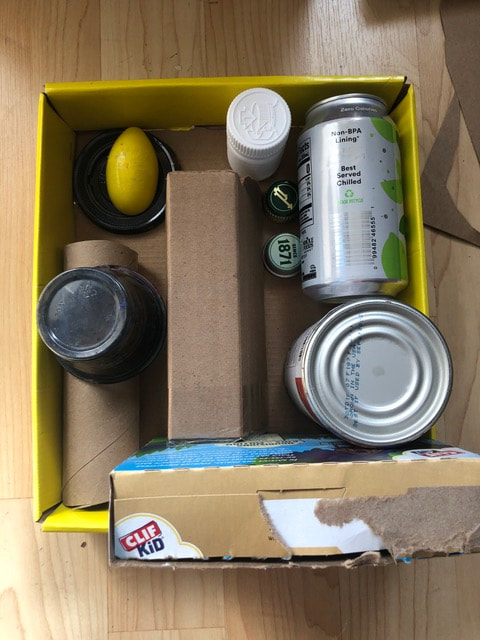
1. Gather your materials: recyclables, cardboard box, white glue/ duct tape/ glue gun (with supervision), paint (preferably acrylic but anything you have is fine), brushes
2. Organize your objects into your box. Try to think of it like you are fitting pieces of a puzzle together. Layer smaller objects on top of larger objects. |
|
|
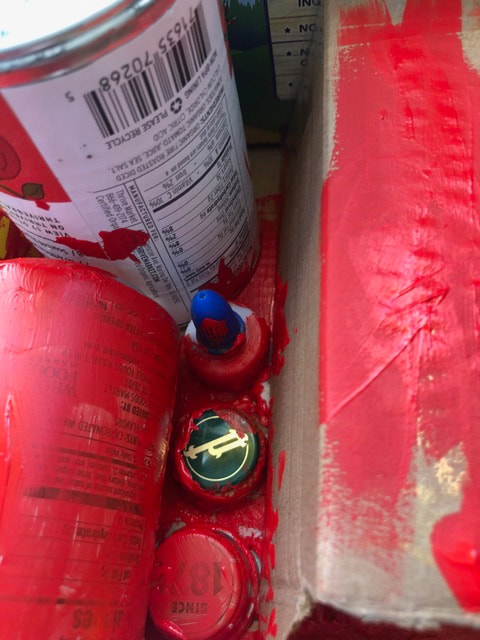
3. Once you are happy with your composition, glue or tape your pieces down. Make sure they are secure. You may have to wait overnight for your glue to dry before painting.
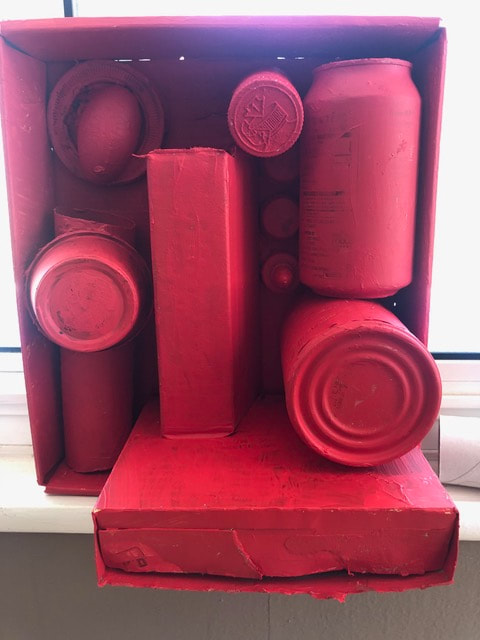
4. cover your sculpture with a single color of paint. Make sure to get all the little nooks. |
|
|
5. Photograph your sculpture and send it to me at [email protected] with your name and room number.
|
|
EXTRA! EXTRA!
Click here to learn more about Louise Nevelson
Click here to learn more about Louise Nevelson
Activity for Wednesday, May 27th
MY FAMOUS MASTERPIECE
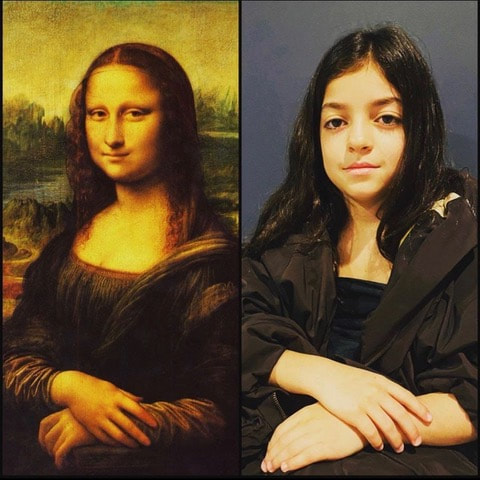
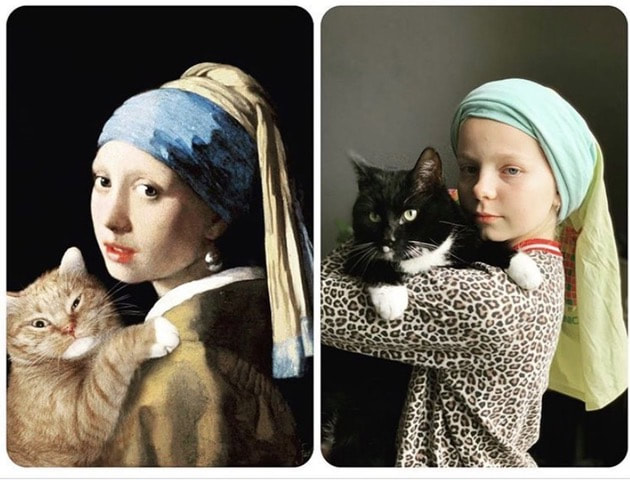
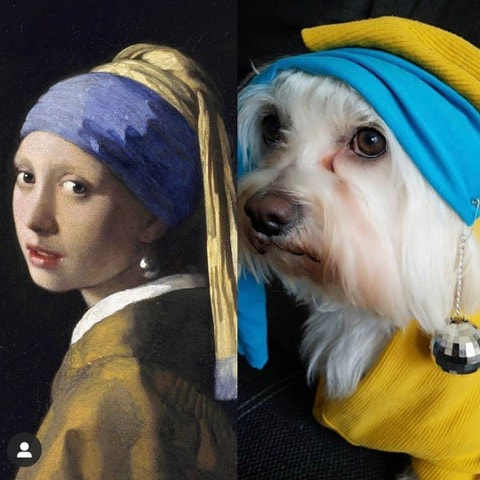
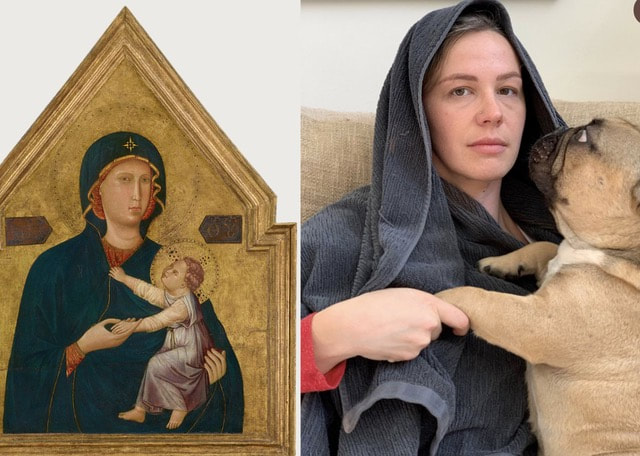
Recreate Challenge
Goal: to recreate a work of art with resources at home
Materials:
Digital camera or device with camera
Sketchbook
Drawing tool
ANYTHING i.e. family members, pets, toys, clothes,
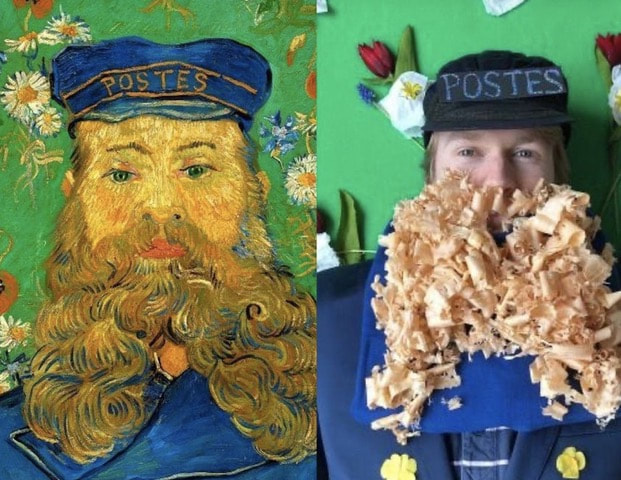
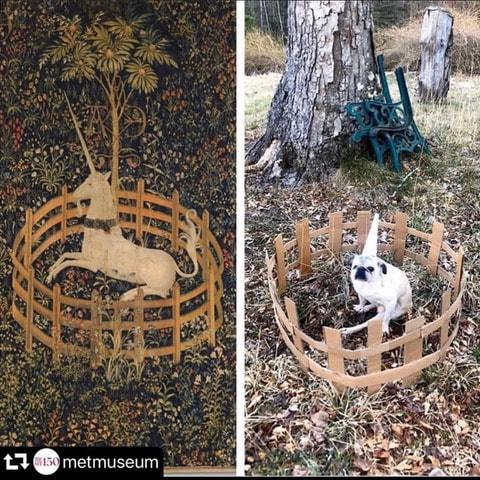
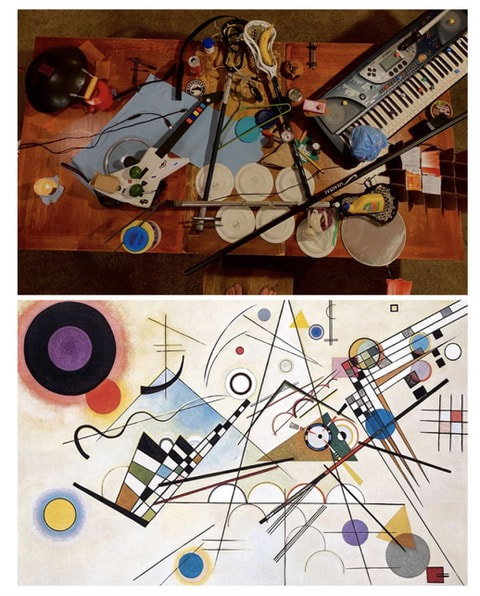
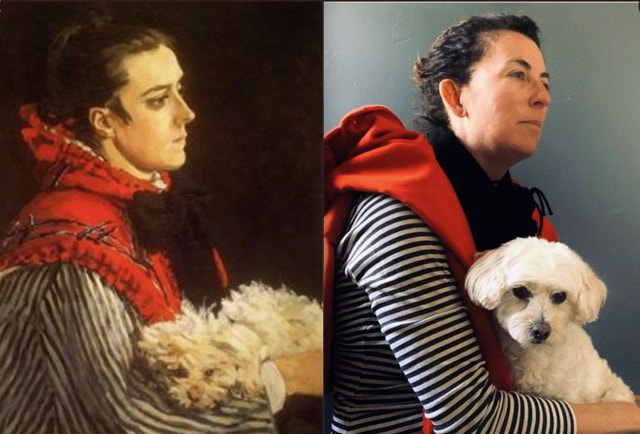
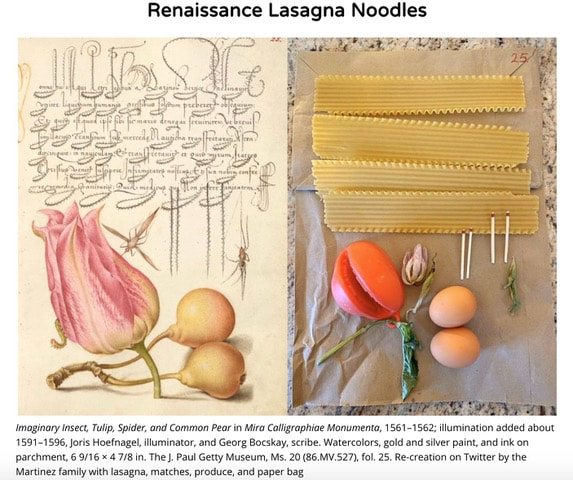
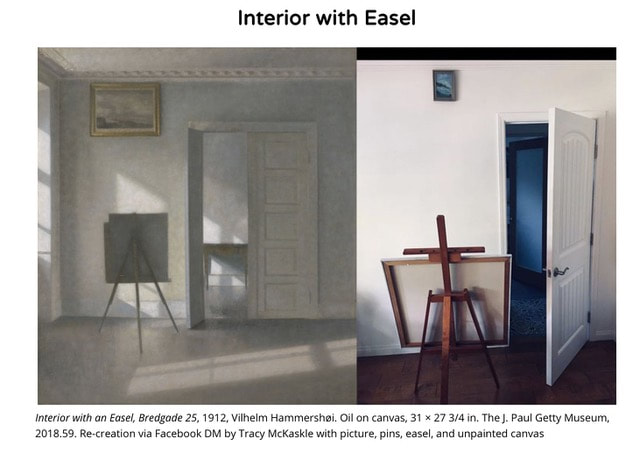
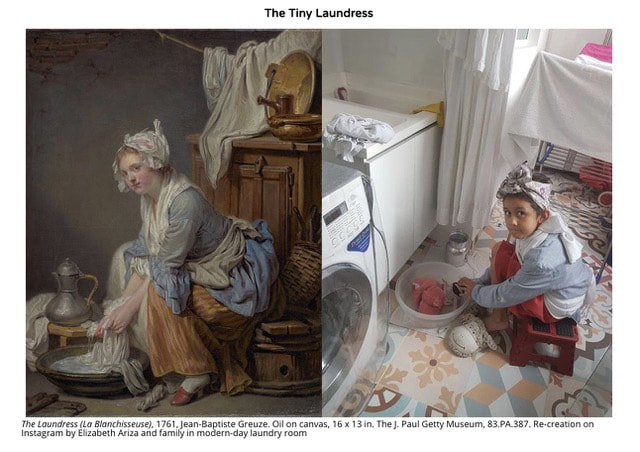
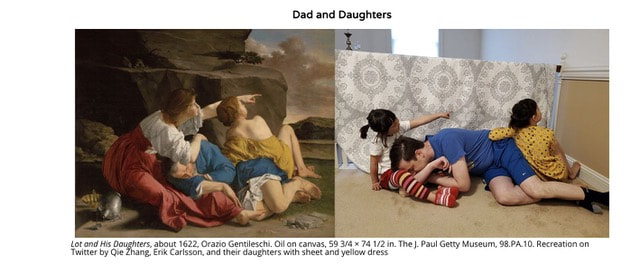
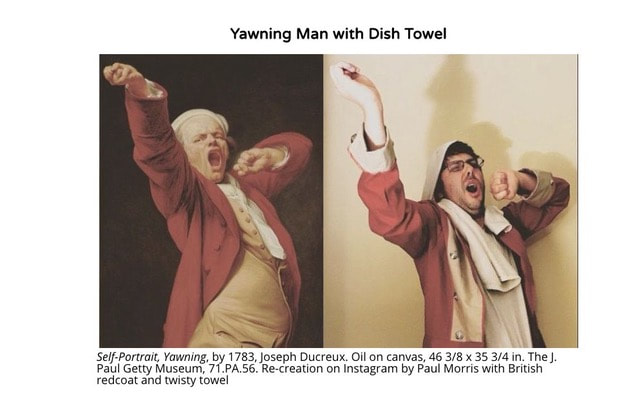
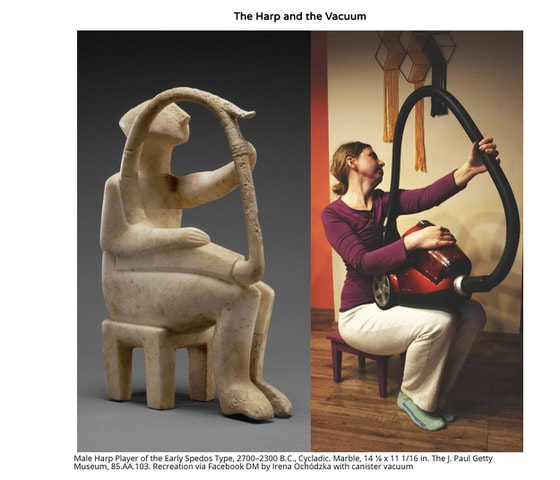
Recreate a famous work of art! The Metropolitan Museum of Art, in New York City, and The Getty, here in LA, issued challenges on their websites, to recreate artwork from their museums.
The Metropolitan Museum of Art
The Getty
Recreate Challenge
Goal: to recreate a work of art with resources at home
Materials:
Digital camera or device with camera
Sketchbook
Drawing tool
ANYTHING i.e. family members, pets, toys, clothes,
Recreate a famous work of art! The Metropolitan Museum of Art, in New York City, and The Getty, here in LA, issued challenges on their websites, to recreate artwork from their museums.
The Metropolitan Museum of Art
The Getty
PART ONE: Research & Select
1. Look at Examples. Do you have any of those materials you could use? What is something inspiring someone used to recreate the artwork? Problem how these people recreated the artwork? What materials did they use? Did they have help?
2. Selecting an Artwork.
A. Recreate one or more of the artworks I have pre-selected by scrolling below. B. Or browse through art
Kid-Friendly Search Tools
Time Machine - This link lets you search by subject and time period
Explore The Met - Search through art on a zoomable map of the museum
Tate Modern - Search by selected artists, art movements, and art topics
PART TWO: Recreating Artwork
1. Think of creative and clever ways to recreate.
2. Make a list of items you will need on a piece of paper
3. Collect those items from around your house
4. Take several photos of your idea. Perhaps you can experiment with different versions. Do you need help taking the photographs? Do you need to prop up the camera or use a self-timer on the camera?
5. Select your favorite photo.
Send a copy of your "My Famous Masterpiece” artwork to me at [email protected]. (Include original artwork with name and title and your recreation). Don’t forget to include your name and room number!
EXTRA! EXTRA!
Pose like a sculpture! Click here for more information.
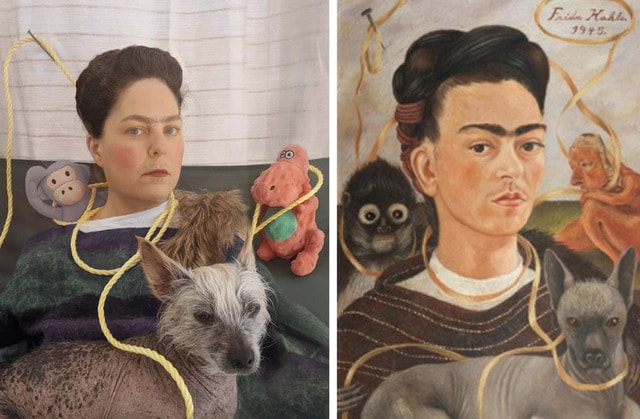
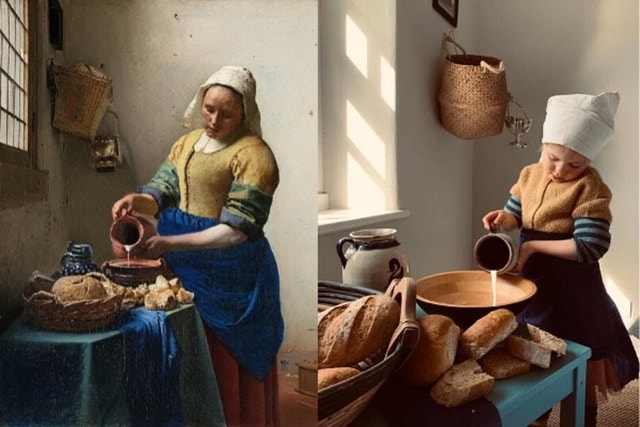
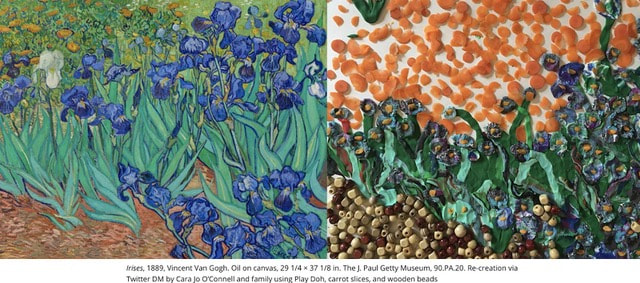
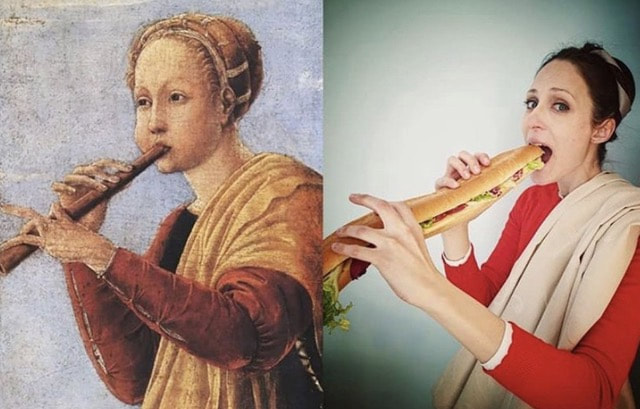
Look through the gallery below of recreated masterpieces for inspiration. You can include other family members, pet, objects around the house, and even food to recreate the masterpiece of your choosing. Enjoy and have fun creating!


Activity for Wednesday, May 20th
Dear Artists,
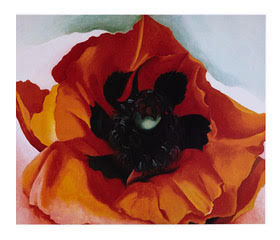
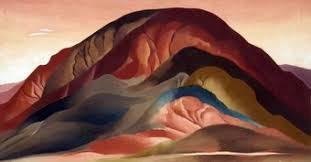
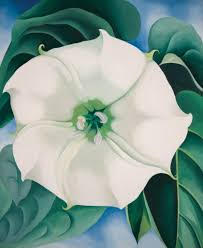
In this lesson we will look closely at natural objects and make a painting or drawing inspired by artist Georgia O’Keeffe.
Georgia O’Keeffe (November 15, 1887 – March 6, 1986) was an American artist who painted nature in a way that showed how it made her feel. She is best known for her paintings of flowers and desert landscapes. She was interested in the importance of composition which means how you arrange shapes and colors. She experimented with shapes, colors and marks while she painted to “fill a space in a beautiful way”. She simplified the objects that she painted to create a unique blend that was both abstract and realistic.
Here are some images of her paintings. What colors do you notice? Notice if there are details that the artist included. Do you think there were details that she chose to exclude or leave out?
|
|
|
The materials you would use are ideally paints and a large paper or canvas. However, use what you have available to you. Crayons or markers work just fine if you do not have paints. Or you can practice your shading and make a pencil drawing.
Step 1: find a natural object you would like to draw and paint. Flowers, leaves, pinecones, wood, are all fine. It should be something that is beautiful and interesting to you!
Step 2: draw the basic outer shape of it filling your page. Make sure that its edges touch some of the edges of your page.
Step 3: choose which details you want to include and draw them
Step 4: Fill in large areas of color using some of the blending techniques you learned earlier this year with watercolors if you are painting. If you are drawing, shade in some areas with dark, medium and light.
Step 5: Fill the background. with colors that you did not use for your object. This will made the object stand out. Keep your background simple.
Sign your work in the bottom right corner. Please send me a picture of it at [email protected] with your name and room number included.
Extra!
Take a tour of Georgia O’Keeffe’s home. What kind of objects do you notice? What are similarities and differences you notice if you compare it to your home. CLICK HERE FOR THE TOUR
Take a tour of Georgia O’Keeffe’s home. What kind of objects do you notice? What are similarities and differences you notice if you compare it to your home. CLICK HERE FOR THE TOUR
Extra! Extra!
Kids learn more about Georgia O'Keeffe at The Tate Museum. CLICK HERE TO LEARN MORE
Kids learn more about Georgia O'Keeffe at The Tate Museum. CLICK HERE TO LEARN MORE
Activity for Wednesday, May 13th
Dear Artists,
One of the things I have enjoyed during this time is fun moments with my kids. I do miss my family members that are far away and call them often as well. Sometimes in the morning when my kids are on a Zoom call with their teachers or with their grandma, I’ve noticed that it is a good opportunity to draw their portraits. They are being quite still during this time. Here are some portraits I made of them. I used coffee for one and beet juice for the other. Yes, I am experimenting with materials that are in my kitchen! Keep in mind that I have had many years of practice. Learning to draw realistically is not a talent you are born with, it is a skill that you develop by practicing. Each time you do it it will be a closer resemblance than the previous time so do as many as you can!
One of the things I have enjoyed during this time is fun moments with my kids. I do miss my family members that are far away and call them often as well. Sometimes in the morning when my kids are on a Zoom call with their teachers or with their grandma, I’ve noticed that it is a good opportunity to draw their portraits. They are being quite still during this time. Here are some portraits I made of them. I used coffee for one and beet juice for the other. Yes, I am experimenting with materials that are in my kitchen! Keep in mind that I have had many years of practice. Learning to draw realistically is not a talent you are born with, it is a skill that you develop by practicing. Each time you do it it will be a closer resemblance than the previous time so do as many as you can!

|

|
Art Lesson: Family portraits
Step 1: Gather the tools and materials that you would like to use. Pencil and paper are just fine. If you have other drawing or painting tools that you would like to experiment with then go for it!
Step 2: Find a subject. It could be a parent, sibling, babysitter (anyone who is willing to be still and post for you for at least 20-30 minutes.) You will need to be able to look closely at their features. You can work from a photo or call someone on a video call to draw too!
Step 3: Here are some basic rules about drawing faces that I like to keep in mind:
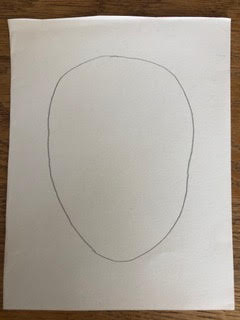
a. Begin with the shape of the head which is basically an oval
|
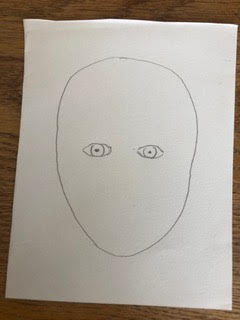
b. the eyes are next and they go in the middle of the head with enough space in between them to fit a whole eye!
|
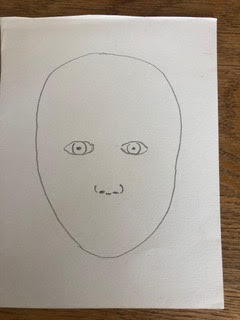
c. The tip of the nose reaches about halfway down between the eyes and the chin. the nostrils are about as wide as an eye.
|
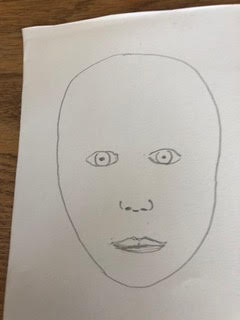
d. The lips come halfway down between the nose and the chin and are wider than the nose.
|

e. The ears and neck are usually much larger than you think so look closely!
|
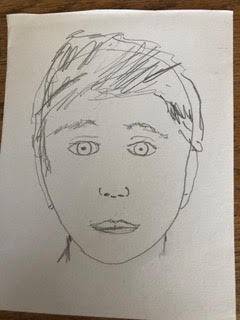
f. Each person’s hair is unique. You can make lines that match the hair lines or draw how it shapes the face.
|
g. Once you have a basic drawing then get colors or shade with your pencil. notice the parts that are light, medium and dark.
Step 4: Take a break and then draw a second portrait. It could be a different family member or the same one.
Step 4: Take a break and then draw a second portrait. It could be a different family member or the same one.
|
EXTRA!
Frida Kahlo was a Mexican artist known for her self-portraits. Family was important to her and she made several portraits of her family members too. Take an online tour of Museo Frida Kahlo which is in her childhood home la casa azul on google arts and culture. Learn about artist Frida Kahlo. Find her family tree that she painted. |

|
Activity for Wednesday, May 6th
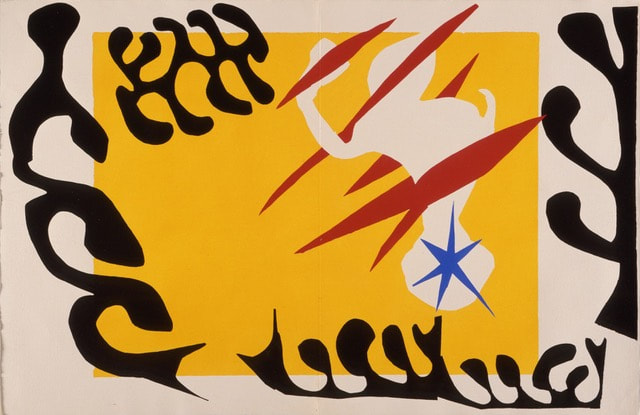
Henri Matisse - Drawing with Scissors
Matisse was a French artist known for both his use of color and original draughtsmanship. He was a painter, draughtsman, printmaker, and sculptor. After 1930 Matisse began to use collage. He used brightly colored paper and scissors to cut out shapes, animals, leaves, dancers and flowers and then arrange them.
Matisse was a French artist known for both his use of color and original draughtsmanship. He was a painter, draughtsman, printmaker, and sculptor. After 1930 Matisse began to use collage. He used brightly colored paper and scissors to cut out shapes, animals, leaves, dancers and flowers and then arrange them.
|

|
- Take some sheets of colored paper and cut out some shapes. Don’t think too much about what you are doing, just enjoy the process of cutting, moving your hand and arm in different directions.
- Once you have cut many random shapes, try to arrange them on a piece of larger paper (white or color) Don't be afraid to experiment with your shapes, they can be apart or touching. You could even overlap them to make a new shape – just play around and see what happens.
- You can use the remnants from the shapes that you cut as well. These are the negative shapes.
- Try to make your abstract shapes remind you of something. Perhaps a bird, a face, or an animal. Matisse used shapes that resembled leaves, stars, people and animals!
- Once you're happy with your picture you can stick your paper shapes down.
- If you run out of ideas, why not look around you for inspiration. Everything has a shape from a flower or a tree to your cat or hamster’s face! Let the world around you feed your creativity.
DIY Color Paper
1. Make your own colored paper by painting or white paper with paint. Make sure to paint the edges of the paper too or use cloth instead of paper. If you don’t have paint, try covering the white paper with pastels, crayons or markers!
2. Once dry you can use it to make cut paper art. Try to organize the shapes into a picture of your home, your family, seaside, or park.
Activity for Wednesday, April 29th
Homemade clay exploration and bird sculpture!
Dear first grade artists,
One of my favorite art materials is clay! I’m excited to share this lesson with you because I know how much fun it will be! Making your own clay is fun but you do not have the ingredients then you may use any clay or playdough that you have at home.
Materials:
Mixing bowl
measuring cup
a cutting board or any flat surface to work on
rolling pin or dowel
blunt knife
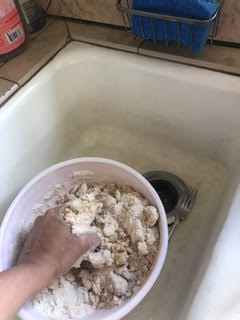
homemade clay: 1 cup flour, 1/3 cup salt, water to mix
Dear first grade artists,
One of my favorite art materials is clay! I’m excited to share this lesson with you because I know how much fun it will be! Making your own clay is fun but you do not have the ingredients then you may use any clay or playdough that you have at home.
Materials:
Mixing bowl
measuring cup
a cutting board or any flat surface to work on
rolling pin or dowel
blunt knife
homemade clay: 1 cup flour, 1/3 cup salt, water to mix
|
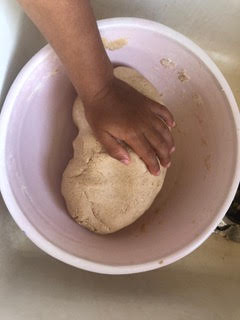
Step 1. Mix the salt and flour together in a bowl. Slowly add in some water a little at a time and knead. You want your clay to hold together but not turn too wet or mushy. Knead and mix it for 5-10 minutes to make it smooth and even.
|
|
Step 2. transfer half your clay onto your work surface. Save the other half for our next lesson by lightly draping in in a damp paper towel and saving it in a plastic bag.
Step 3. Experiment!
ROLL it, PAT it, SQUISH it.
Can you flatten some out into a pancake? Maybe keep flipping it so it doesn’t stick to your board.
Roll some pieces in to long snakes! What can you turn them into when you attach them together?
Tap and turn it to make some geometric forms with flat sides like a cube!
|
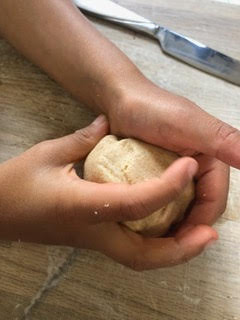
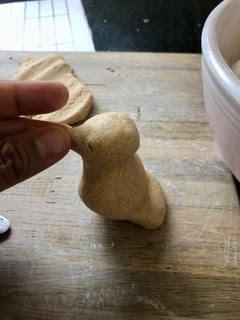
Step 4. Clear your surface and bring out the other half of your clay to create your bird. Roll it into a neat ball to start.
|
|
|
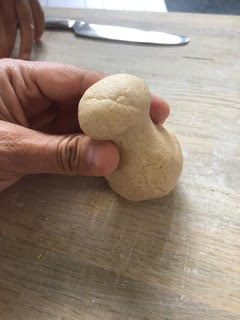
Step 5. Gently pinch close to one side to create a neck.
|
|
|
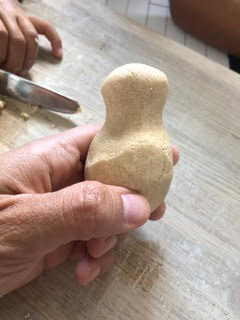
Step 6. Pinch out a tail on the other end
|
|
|
Step 7. Gently shape a pointy beak on one side of the head
|
|
Step 8. You may attach or draw on wings, eyes, texture for feathers to make your bird look more real!
|
This is a video from a clay artist who gives a tour of her studio in New York. She also shows some of the projects she has worked on using regular clay, as well as project she did with the same type of clay from today's lesson.
|
|
Activity for Wednesday, April 22nd
Dear Artists,
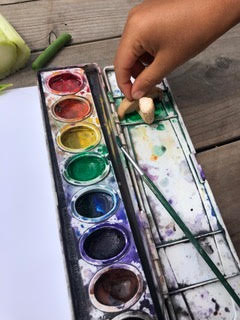
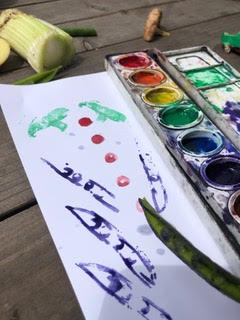
In this lesson you will be printing with vegetables. You can ask your grownups for the following supplies:
1. vegetable ends or pieces sliced in half
2. paper
3. any kind of paint or stamp pad
4. a brush or sponge and water
5. a plate or tray or you may use the lid of your paint tray
In this lesson you will be printing with vegetables. You can ask your grownups for the following supplies:
1. vegetable ends or pieces sliced in half
2. paper
3. any kind of paint or stamp pad
4. a brush or sponge and water
5. a plate or tray or you may use the lid of your paint tray
|
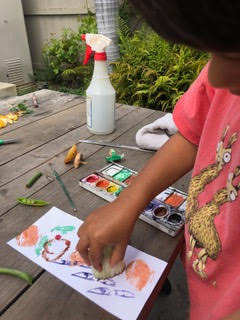
1. Start by wetting your paints if you need to and dipping your veggies cut side down into your paint. Then bring it over to your paper and press firmly to print.
|
|
|
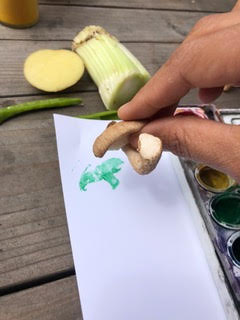
2. Experiment with each vegetable that you have to see what shapes it makes
|
|
|
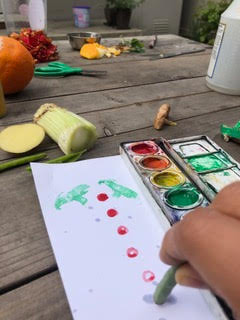
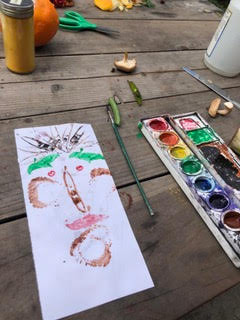
3. Once you know your materials and the shapes that they create, see if you can create a print on another paper or the back of the one you used. Can you make a pattern or a picture by putting the shapes together? Have fun with this!
|
|
Activity for Wednesday, April 15th
Dear 1st Grade students,
I hope you are all doing well and having some good times with your families. I miss seeing your smiling faces and look forward to making art with you all again soon. In the meantime, I’d like you to keep up your creative practice at home. Remember when we went looking for textures around your classroom or outside and made rubbings? You can use that same technique as you do this lesson:
1. Collect at 6-10 different leaves with interesting and different shapes.
2. Arrange and then tape or glue them down onto a piece of paper. You may overlap or space them out if you like.
3. Set another paper down over them and create a rubbing using either a pencil or crayon.
4. Sign your name in the bottom right corner of your rubbing.
5. (optional step) Ask your parent to photograph your picture and send it to your teacher.
I look forward to making art with you all soon.
Warm wishes,
Ms. Kusum
(Your Art teacher)